Dough Circuits: LED Caterpillar
Build a circuit with play dough, LEDs and a 9 volt battery.
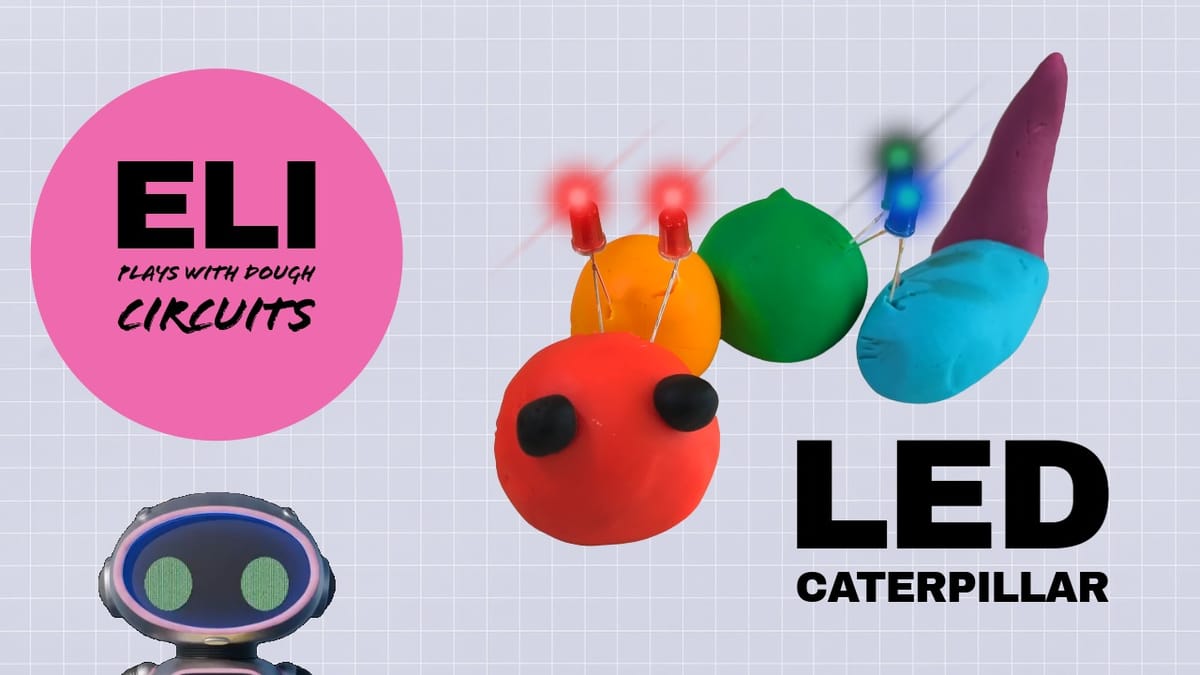
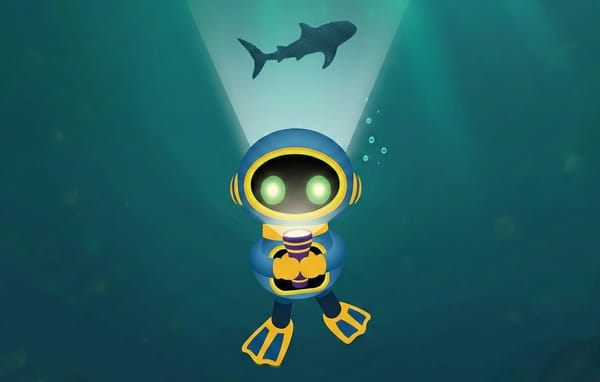
What do you get when you combine a love for kids dough projects with some basic electronics? An LED light-up caterpillar, of course! This fun project, inspired by ELI the robot's adventure, is a great way to introduce your kids to the world of circuits. The best part? It uses a special ingredient: conductive dough!
That's right, certain types of dough, like play dough and salt dough, can conduct electricity, making it the perfect material for a circuit.
Let's get started on this simple and engaging project.
You can also watch a quick tutorial on YouTube!
Youtube Caterpillar Tutorial
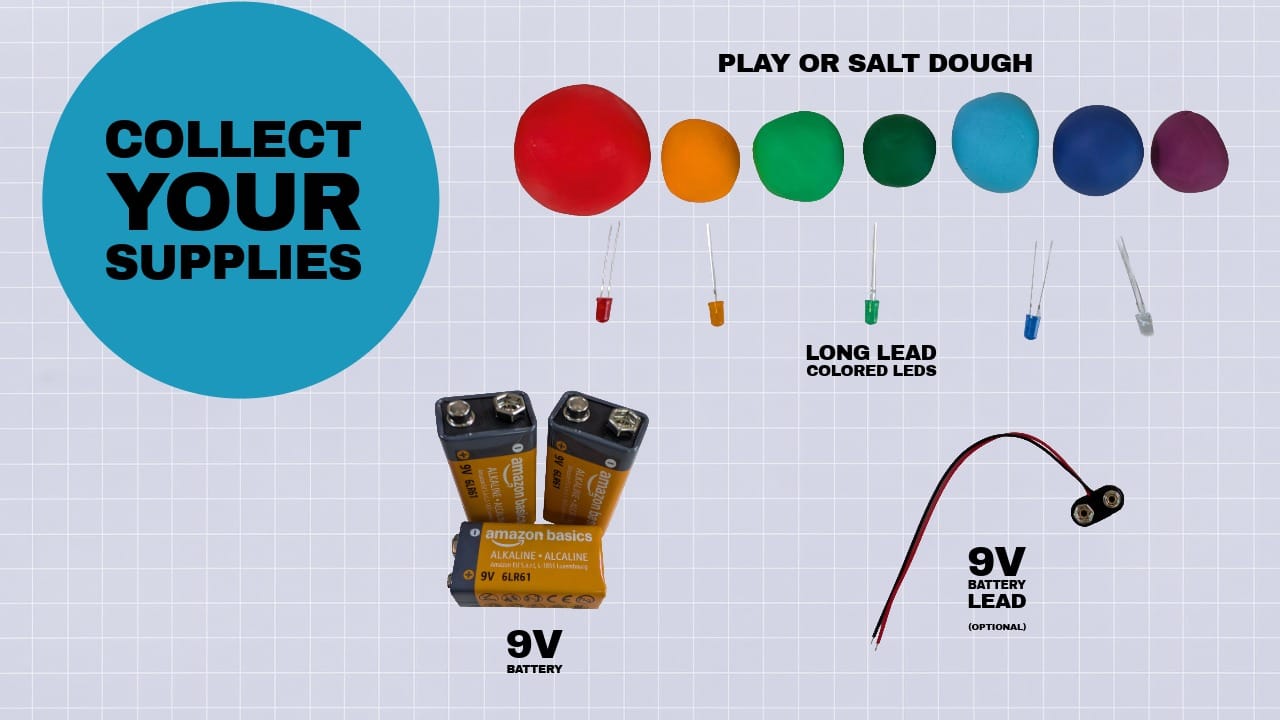
Gather Your Supplies
First, you'll need a few items to bring your caterpillar to life.
- Play dough or salt dough in various colors
- Several LEDs (light-emitting diodes)
- A 9-volt battery
- A 9-volt battery lead (optional, but makes it easier)
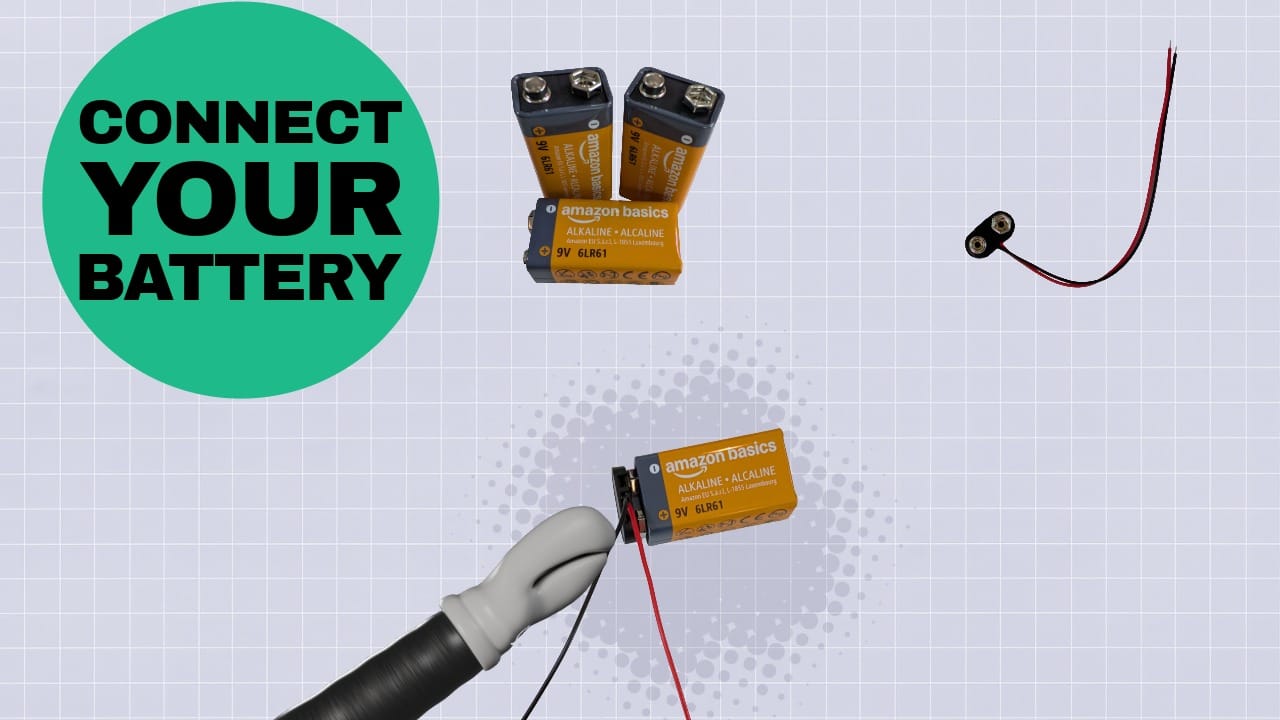
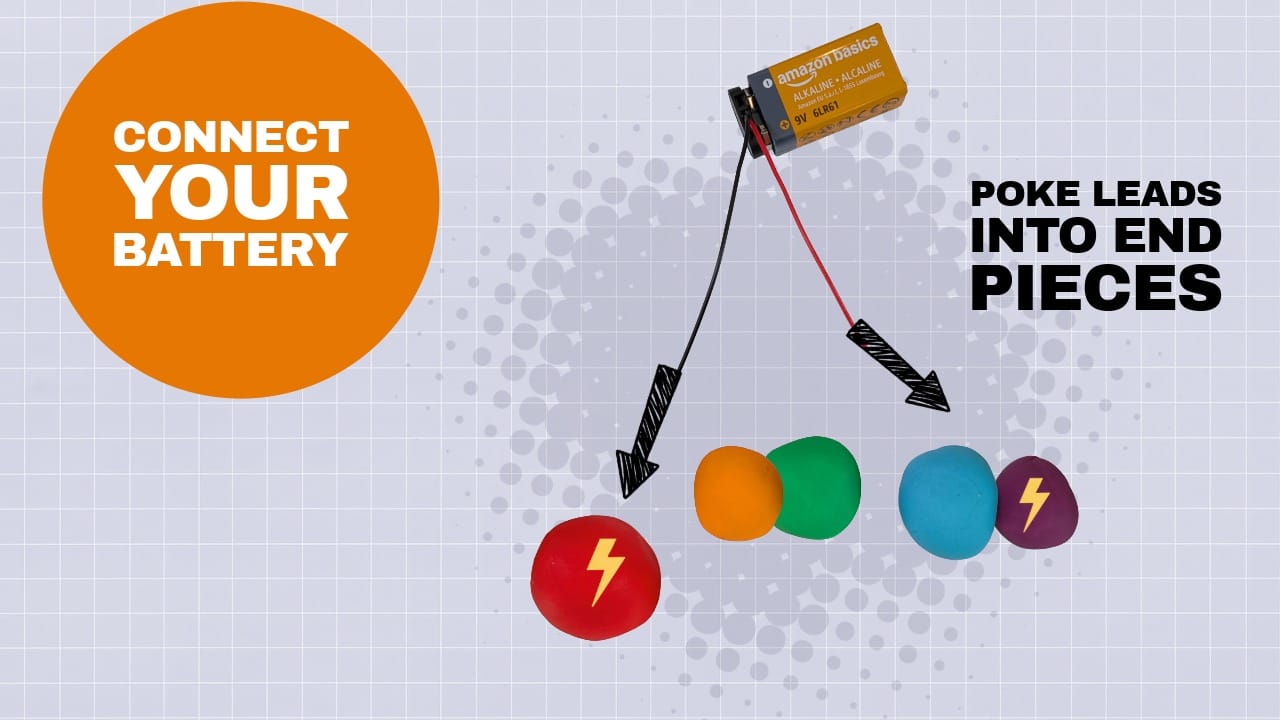
Connect the Battery
You've got the power! If you have a battery lead, attach it to the terminals of the 9-volt battery. If you don't have a lead, you can stick two separate pieces of dough directly to the separate battery's terminals, leaving them disconnected for your project for the moment.
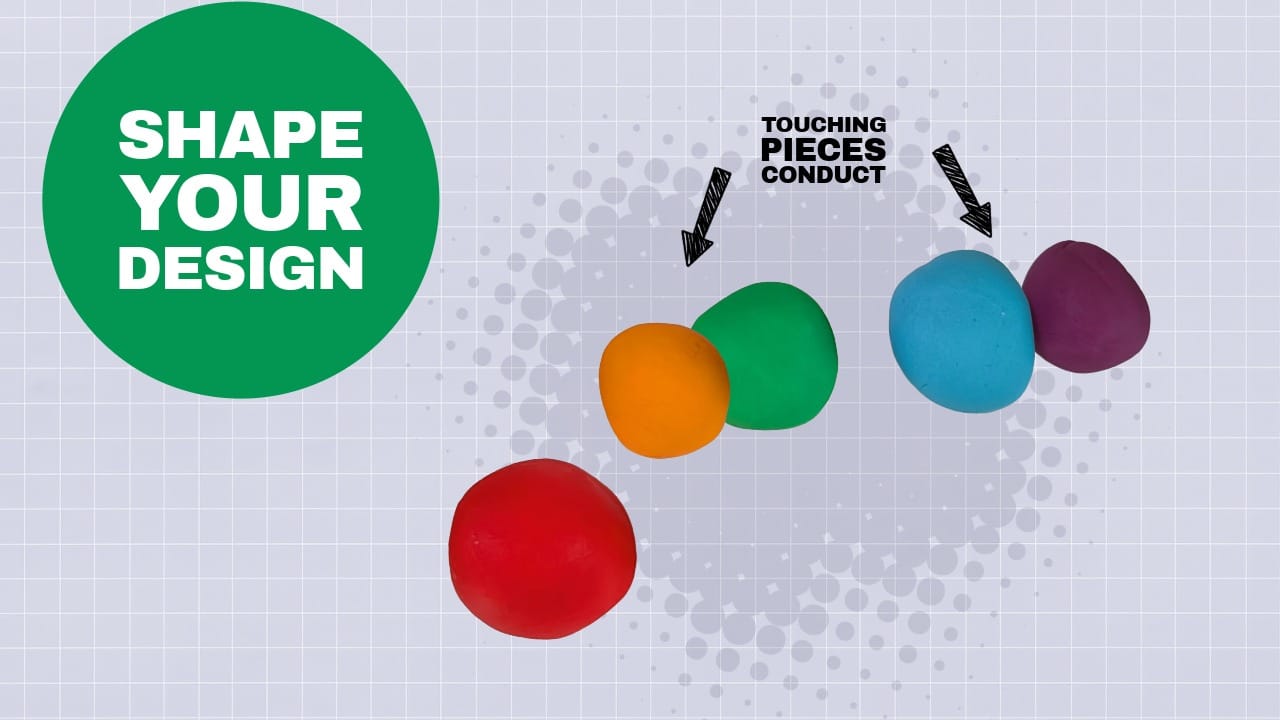
Shape Your Caterpillar
Now for the fun part: creating your caterpillar!
- Take your dough and roll each color into a ball.
- Line them up to form the body of your caterpillar. Make sure each piece of dough is touching the next one. This contact is important because it allows the electricity to flow from one piece to the next.
- Leave gaps between the pieces you want to bridge with LED lights.

Add the Power
With your caterpillar shaped, it's time to bring in the power source.
- Poke the black wire from the battery lead into the first piece of dough.
- Poke the red wire into the last piece of dough. This creates a path for the electricity to flow through your caterpillar's body.
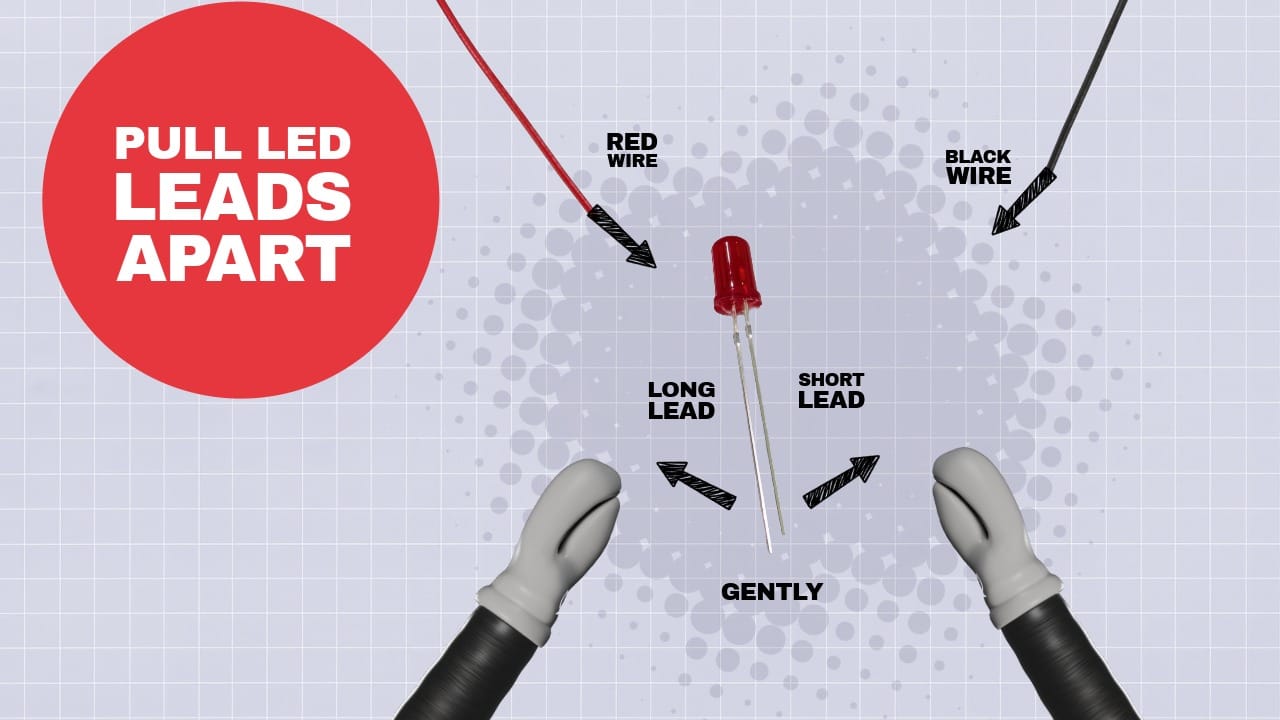
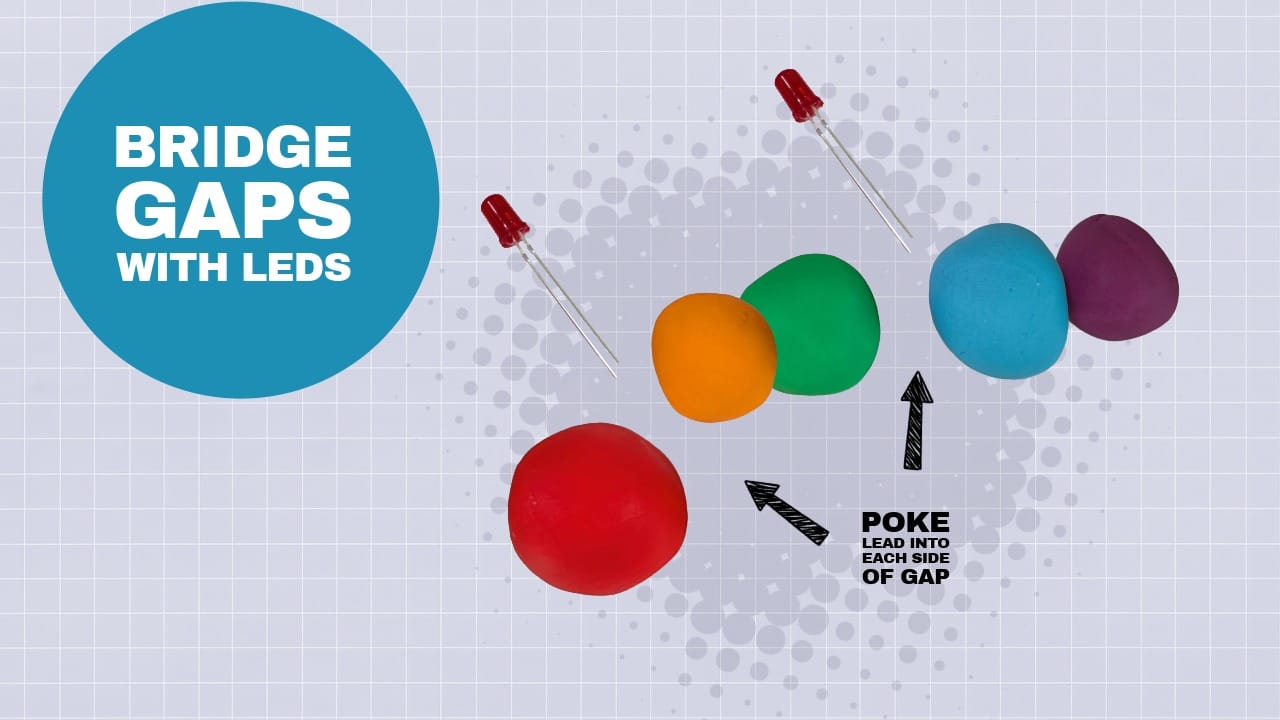
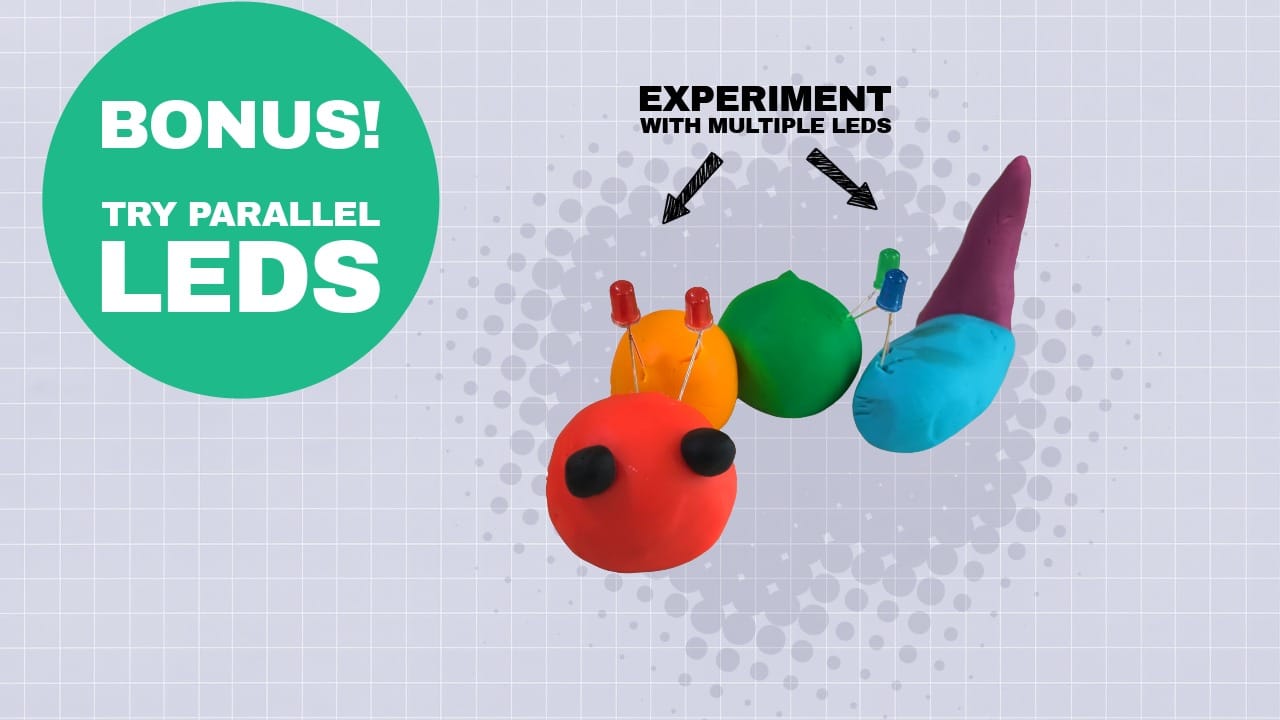
Bridge the Dough Circuit with LED Lights
Now for the main event—adding the lights!
- Look closely at an LED. You'll notice it has two wires, or leads: one is shorter than the other. The shorter lead is the negative side and the longer one is the positive side.
- Gently pull the leads apart to create a wider gap.
- Place your first LED across the gap between the first two pieces of dough.
- Gently push the leads into the dough so they are firmly in place.
- Repeat this for the other sections of your caterpillar.
As soon as your circuit is closed from the battery, through the LED, and back to the battery, you should see your lights powered!
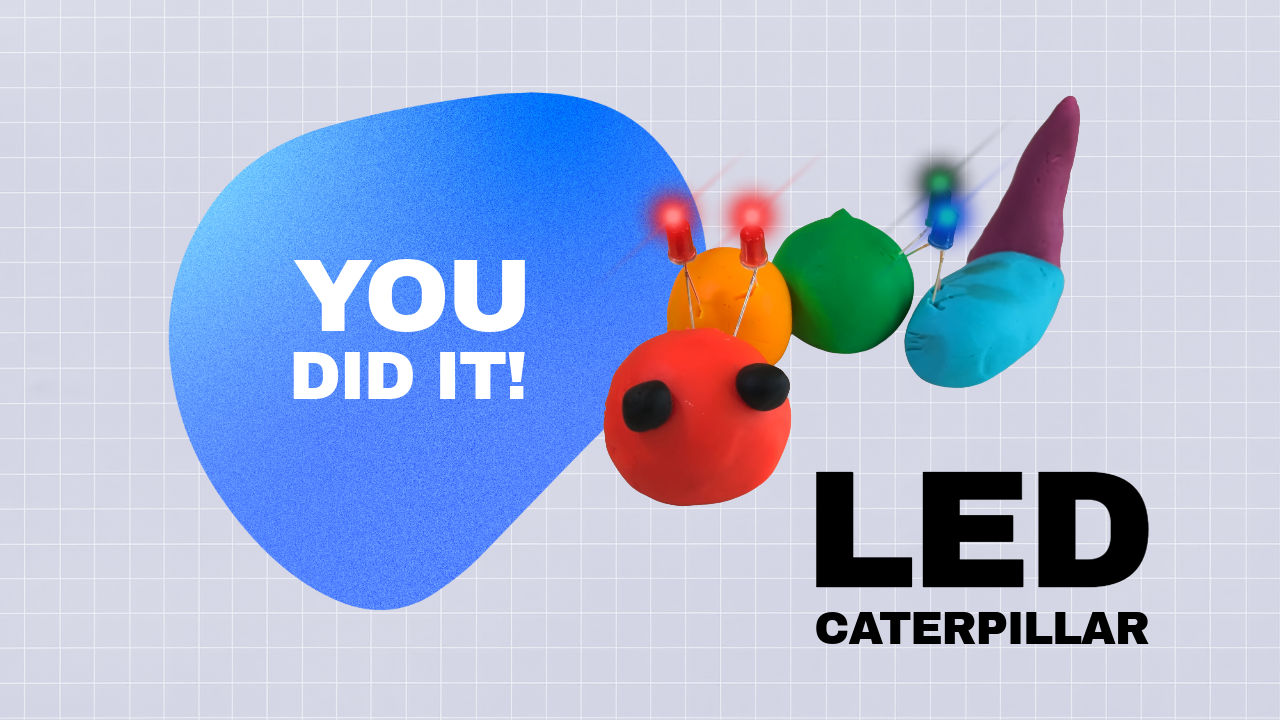
Light It Up!
When you're finished, your LED lights should come on, and your caterpillar should glow!
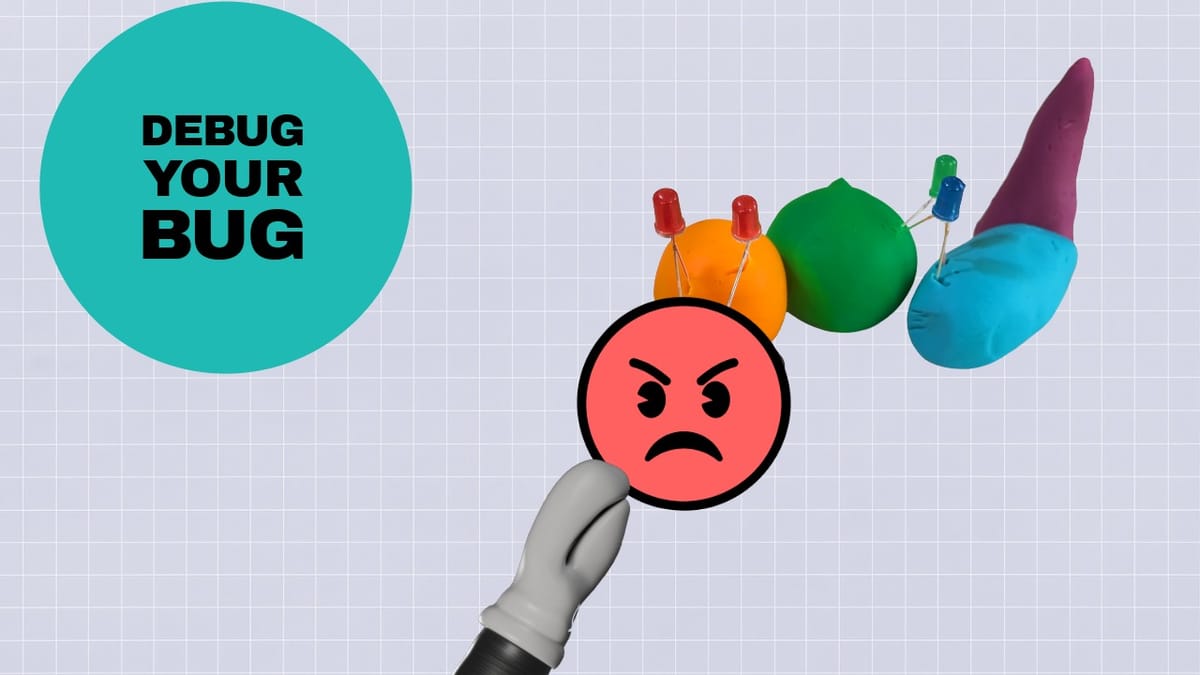
Troubleshooting Common Problems
If your lights don't turn on, don't worry! This is part of the fun of working with circuits. Think of yourself as a "bug detective" and try these steps to debug your bug. See this post if you're struggling:
Share Your Creations!
This project is a great way for children to learn about simple circuits, conductors, and how electricity flows. Plus, they get to build a cool, glowing caterpillar!
Did your caterpillar light up? We'd love to see it!
Use the hashtag #AWEProjects to share your project results!
Upgrade to our Explorers or Voyagers programs to gain access to the full project library, including more caterpillar experiments!